CNC Mill
Jump to navigation
Jump to search
https://www.bionicasystems.com/promill/
A2 ProMill
660 x 430 x 150 ( check z as is 170 in grbl)
ER-20 collet size
Software: Controller board: GRBL https://github.com/gnea/grbl/wiki
G code sender (PC): Universal Gcode Sender
from the notes he was using- UGS platform 2
https://winder.github.io/ugs_website/
John's Guide to Using the CNC Mill
This is an overview of how to make things on the CNC Machine. You will need:
- A computer that can run a CAD/CAM program.
- A laptop that can plug into the CNC Machine. (This can be the same as the computer that you ran the CAD/CAM software on)
- At least one CNC router bit.
- Some stock that you want to mill (typically wood, but can be aluminium or acrylic).
- Lots of patience.
A typical process is:
- Make a 3D computer model of what you want to make. (For this I use Fusion 360. There is a free version of Fusion 360 which is very capable of making just about any 3D model.)
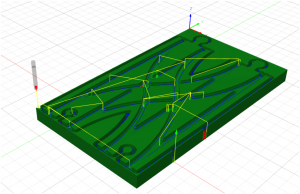
- Create one or more toolpaths. (I do this within Fusion 360.) Each toolpath will be used to tell the CNC machine how to move the router bit in order to mill the shape you want.
- Export the toolpath(s) as a G-Code file. This is essentially the instructions that need to be sent to the CNC machine to get it to do the milling. Fusion 360 will do this for you, and save it as a file such as "my-g-codes.nc".
- Use a piece of software to send the G-Code to the CNC machine. I use UGS (https://winder.github.io/ugs_website/). This must be running on a laptop connected to the CNC. It connects via a standard sized (type-A) USB port.
- Put a CNC Router Bit into the spindle of the CNC Machine. I typically use a 1/8" flat end-mill.
- Put your wood onto the CNC bed, and fix it down. (I use hot-glue for this)
- Run the toolpath to mill the piece of stock to the desired shape.
Parts of the machine
The CNC Machine is composed of the following parts:
- The spindle. This is the part that turns the router bit and does the milling.
- The chuck. This holds the router bit in a collet. We have a set of collets. Pick one that matches the size of the bit you want to use. You will need to use two spanners to get the chuck open and release the collet.
- The gantry. This is the part of the machine that holds the spindle and moves it in the X and Y directions. Watch out for this because it moves around blindly when the machine is in operation, and can bump against anything you have left laying around. It is best to make sure that the surrounding area is as clear a possible when using the machine.
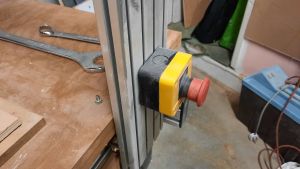
- The kill-switch. This is mounted on the gantry. It kills the machine, i.e. it instantly stops the gantry moving, and blocks any commands from the controller to the machine. Use it in emergencies to stop the machine moving. But note that it doesn't stop the spindle spinning. Also note that it doesn't kill power to the machine. It is also a locking-switch, so once pressed you need to turn it to get it back on again. the CNC will be useless and not respond to your commands until you unlock the switch.
- The spindle-speed controller. This turns the spindle on and off, and also allows you to set the speed of rotation. This particular machine does not allow you to control the speed via G-codes, only manually. To get the spindle spinning you need to make sure this controller is plugged in. Then press the green button to turn on the controller. Then turn the dial to select your desired speed. The speed is shown on the display in RPM. A typical speed to use may be something like 15,000 RPM.
- The spindle is a powerful device and can get very hot in operation, so it is water-cooled. The water coolant is provided by two clear pipes running from the top of the spindle to a small header-tank mounted on the gantry. This should be switched on before starting the spindle, and left running when the machine is in use. It is switched on by just plugging it in. You will see it is working because you can see the water moving in the header tank.


